Getting Started
Your First Board
A ten-minute walkthrough from an empty app to a working project with tasks, notes, and a reminder.
This walkthrough builds one real project from scratch. By the end you'll have used most of the things you'll touch every day.
1. Make a space
Spaces are optional, but they keep the sidebar tidy once you have more than a handful of projects.
- Tap + at the top of the sidebar and choose New Space.
- Type a name next to the icon, for example "Work".
- Pick an icon and a color. The search field finds any SF Symbol by name.
- Tap Done.
2. Make a project
- Tap + again and choose New Project, or right-click the space and choose New Project in Space.
- Name it, pick an icon and color, and choose the space it belongs to.
- Tap Done.
A new project starts with a set of default columns. You can rename, add, or delete them freely.
3. Shape your columns
Columns are the stages a task moves through. Three is a good start: To Do, Doing, Done.
- To rename a column, open its … menu and choose Edit Column. Type the new name next to the icon.
- To add one, tap Add Column at the end of the board (⇧⌘C on the Mac).
- To reorder, drag a column by its title. On iPhone and iPad, press and hold the title first.
If you want completed cards to disappear from the board rather than stay crossed out, open Project Settings and set Task Completion to Move to Archive. See Archive for how this works.
4. Add tasks
Every column ends in an Add task field. Tap it, type a title, and press Return. The field stays ready for the next one, so you can pour in a whole list without lifting your hands.
Try adding five or six. Then drag one from To Do to Doing.
5. Open a task and fill it in
Tap a card to open it.
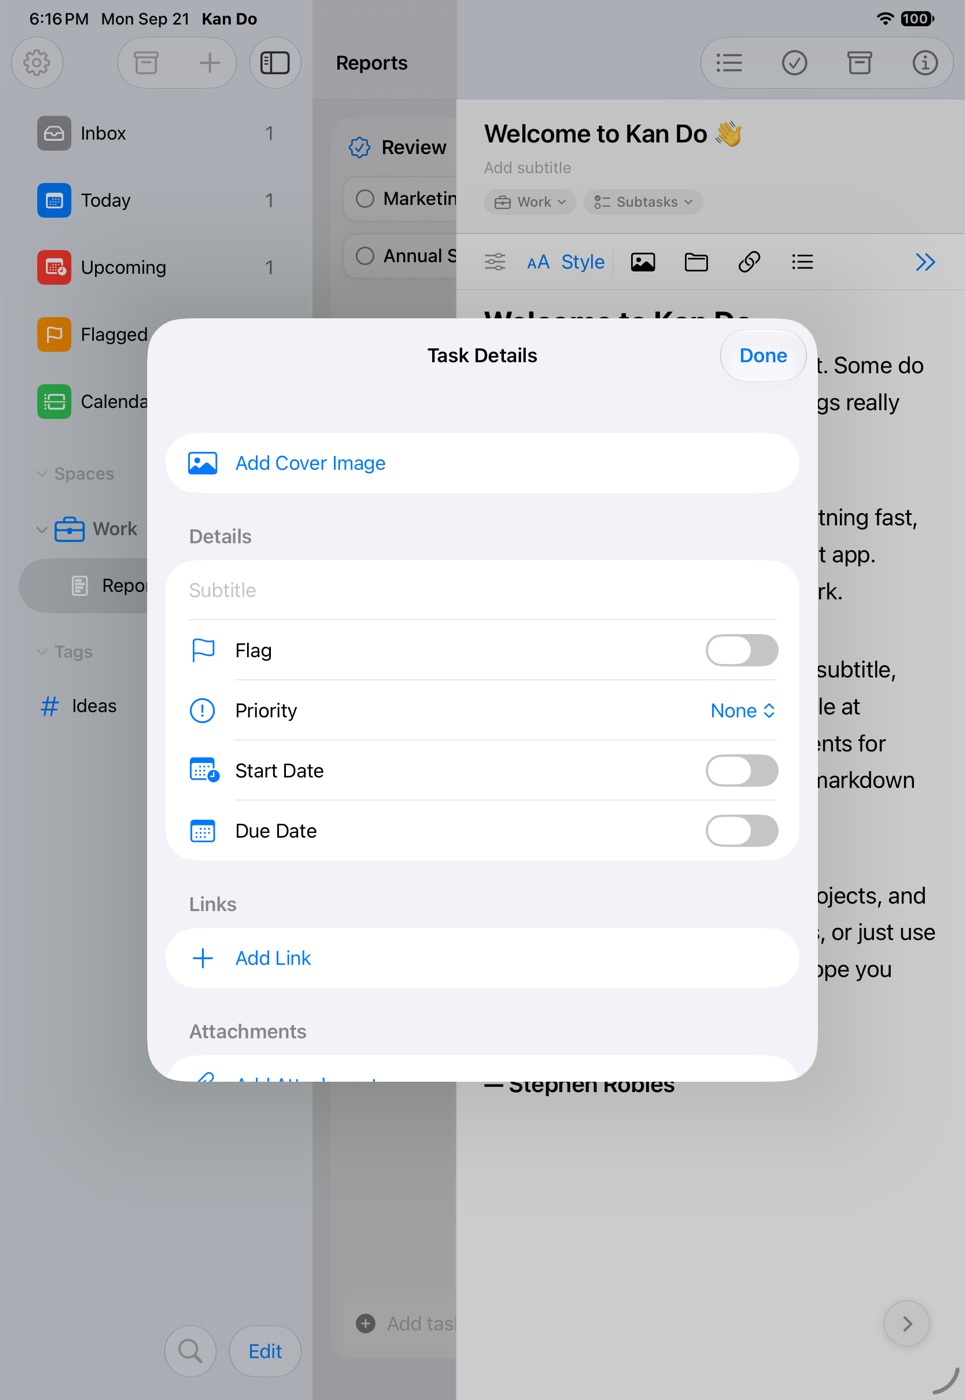
- The title is at the top. Tap Add subtitle to add a second line that shows on the card.
- Tap Add details… to reveal the details: due date, start date, priority, flag, repeat, tags, links, location, and attachments.
- Set a Due Date, and turn on Alert When Due if you want a notification.
- Choose a Priority of Low, Medium, or High. It appears as one to three bars on the card.
- Add a tag by tapping Tags and typing a name. New names create new tags.
Below the details is the notes editor. Type a heading, a few bullets, and a to-do item. The formatting bar (above the note on the Mac, above the keyboard on iPhone and iPad) has everything: styles, lists, checkboxes, quotes, code, colors, links, images, and attachments. The Notes Editor goes through each tool.
6. Give a card a cover image
Right-click a card (or press and hold on iPhone and iPad) and choose Add Cover Image. Pick from your Photo Library, take a photo, choose a file, or use a picture that's on your clipboard. The cover shows on the card as a strip down the left side by default. Project Settings lets you switch the whole board to Square or Widescreen covers across the top of each card.
7. Complete one
Tap the circle on a card. It fills, a small burst of sparkles plays, and the title gets a strikethrough. Depending on the project's Task Completion setting, the card either stays on the board crossed out or fades away into the archive.
8. Check Today
Tap Today in the sidebar. Anything you gave today's date is there, along with anything overdue. Tomorrow's tasks are in Upcoming. Tasks you flagged are in Flagged. These lists pull from every project at once, which is how Kan Do turns a set of boards into a daily to-do list.
Where to go next
- Boards and Columns for sorting, filtering, dividers, and column options.
- Tasks and Cards for every field a task can hold.
- Smart Lists for how Inbox, Today, and Upcoming decide what to show.
- iCloud Sync to bring your other devices in.